
Are you looking to upgrade your sound setup or home theater? Perhaps you’ve been thinking about in-ceiling speakers, a wise choice for beautiful surround sound. But do these in-ceiling speakers need a backbox with them?
Any time you put a speaker in your wall or ceiling, you should use a backbox. It serves a soundproofing function, improves audio, and protects your speakers. With a backbox, you protect the investment of built-in speakers and keep sound localized.

What Is a Speaker Backbox?
When putting a speaker into a ceiling or a wall, the backbox is what serves to protect your speakers. It keeps the audio quality intact while preventing the sound from traveling to other areas where it is not wanted.
This device captures and then redirects your sound waves from the in-ceiling or in-wall speakers you install.
You can build a backbox out of so many different types of materials, even wood or plastic. When you use the right backbox, it protects the speakers as well as supports them.
I love in-ceiling speakers because they relay sound into rooms without you having to see them. You can read more about why I love in-ceiling speakers for surround sound.
They can be hidden so well that you’ll surprise and delight your guests, and even yourself when listening to music or watching movies. Most of these types of speakers though don’t include a backbox.
Without a backbox, you lose the sound quality of those speakers. I personally think if you’re going to invest in such a setup, you have to put in a backbox.
This also boosts sound quality while dampening in a soundproof way to keep sound from going up to your second floor and waking little kids at night or in city settings, disturbing the neighbors around you.
With a backbox, the sound gets redistributed to the room you want it to be in, while protecting your speaker, keeping it mounted safely in your ceiling. You get a nice clean look for your home theater setup without any obvious wires too.

When Should You Use a Speaker Backbox?
Use a backbox for all speakers that are installed into ceilings or walls. These devices provide improved audio, speaker protection, and soundproofing to your setup and enhance the value of your investment into your sound system.
If you’re about to install your new home theater, you’ve probably noticed that there are hundreds of speaker choices.
Hanging speakers are an option, but they take up so much room. And personally, I think they’re a bit unsightly.

Plus, they take up so much space. Do you really want your room to look closed in? That’s why in-wall or in-ceiling speakers are a wonderful choice. But you’ve likely heard they sound terrible and that is precisely why you need the backbox because many people skipped that step in installation and you can’t do that.
When you skip adding a backbox in your family room downstairs or in the central portion of your home, the sound penetrates through the rest of the house.
You’ll constantly be on high-alert when the kids come in yet again because your action movie thumped them out of bed.
Additionally, all those vibrations can dislodge dust particles from behind your speakers. With a backbox, you prevent that dust from coming out, which can ruin your sound quality.
Backboxes also secure your speakers and keep them from falling out. They stay put, and you get to enjoy maximum sound quality for years to come.
Of course, you can hire someone to install your in-ceiling or in-wall speakers with a backbox, but that’s more expensive. It’s fairly easy to do this all yourself. Follow my guide below to see how to do it, and you’ll save a ton of money.
Step-By-Step Guide on How to Build a Backbox for Speakers
My guide that follows below is going to walk you through building a backbox for your speakers. If you’ve assembled anything before, this is no different.
My advice is to read through all these steps first and then gather your materials when you’re ready to proceed.
This method for building a backbox requires the use of wood. I think it lasts longest and is the best quality.

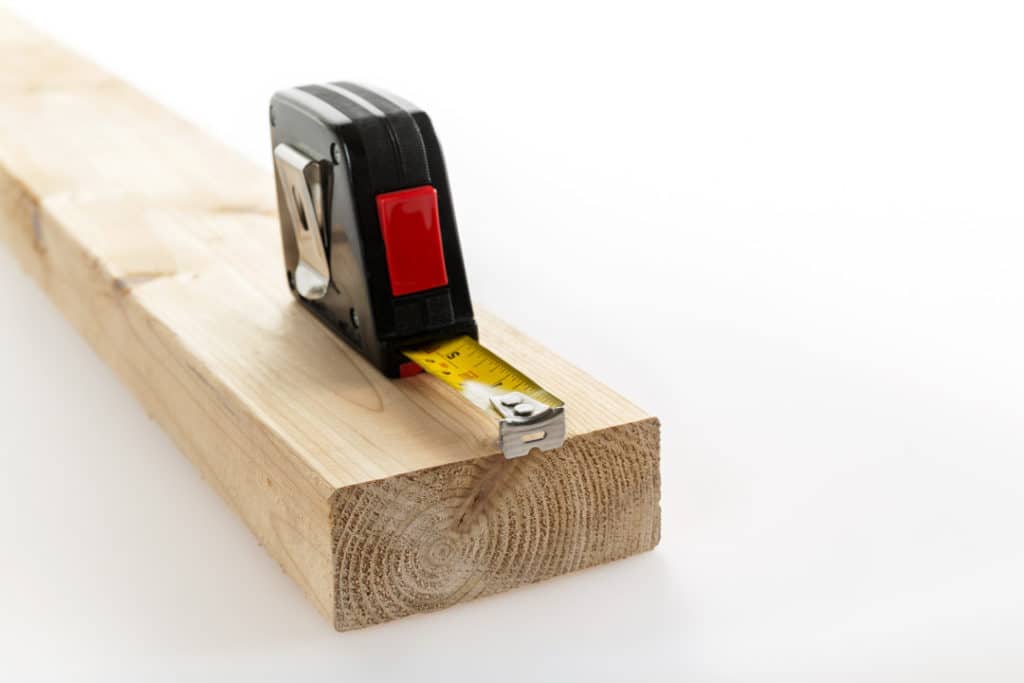
■ Step 1: Measure the Exact Dimensions of Your Ceiling Speakers
I have talked before about the importance of measuring precisely. Please make sure you measure your ceiling speakers for their exact sizing.
You should measure the diameter of the face of the speakers as well as the depth. Measure it twice. Even triple-check it. Just make sure you’ve got it correct before you go on to the next steps.
■ Step 2: Make Your Sides Using a 2×4
Now that you have your measurements, cut up 2×4 pieces that will match those dimensions for the 4 sides of your backbox.
Generally, most openings will only allow for about 3 inches in depth when it comes to walls. For ceilings, though, you can use the full 4 inches.
Please keep this in mind since you may very well need to cut an additional time before you put it together if you want it to fit.

■ Step 3: Time to Build the Speaker Frame
Ok, so now you have your frame pieces cut. You’ll want to officially join them together.
You can use a nail gun or screws to lock them into place, but before you do, you should make sure that the frame all fits together in place.
It’s a bear if you staple it together only to realize it’s not fitting right. Then you’ll have to take it apart and start over.

■ Step 4: Get the Backplate Ready
Once you’ve got the frame assembled together, you need to measure and cut the backplate. You can do this by tracing the frame’s shape onto MDF or OSB.
Time for the table saw! You’ll use this to cut along the lines to make your backplate for the backbox. Once it’s ready, you will join this to your frame, again using your nail gun or screws.

■ Step 5: Soundproofing Process
Your backbox is officially a backbox, but you really should go the extra step to make it more soundproof.
To do this, you need thinner MDF or OSB and a damping sound compound like the Green Glue Noiseproofing Compound (Amazon link).
Just like you did with that backplate, you’ll have to trace the dimensions of your frame onto the thin pieces of either OSB or MDF. But before you attach them to your frame, you will want to spread a nice layer of that damping compound between each piece.
This will add more soundproofing and keep your sounds only where you want them. You don’t have to do this step, but I recommend it for the best soundproofing quality.

■ Step 6: Run Your Wires
Once your backbox is complete and everything is dry and set, you will need to drill a hole in the back.
Otherwise, how can you run the wires to and from the speaker?!?

■ Step 7: Now for the Install
If you’ve made it this far, this installation of your backbox is a literal piece of cake. You’ll have to cut a hole in the drywall to fit your in-ceiling or in-wall speakers.
The back box needs to fit snuggly right up against that inner drywall. You can use acoustic caulk to fill any gaps.
Putty pads will fill the wire holes after you run the cables through. That further seals in your sounds for perfect optimization.

Alternatives for Backboxes for In-Ceiling Speakers
Ok, let’s say you’re not handy or you’re short on time and simply can’t commit to making your own backbox, nor can you hire someone.
Perhaps you don’t own your property and don’t want to upset your landlord who has invested in soundproofing the apartment or rental unit.
Whatever it is, you might be seeking alternatives for backboxes. Keep reading to discover your options.
■ Get Soundproof Enclosures
If you can’t or don’t want to go doing it yourself, you can find ready-made options for soundproof enclosures made exclusively for hidden speakers.

▪️ For In-Ceiling Speakers…
I recommend Dynamat 50306 DynaBox Speaker Enclosures (Amazon link). This is one of the leading brands for sound deadening materials used for soundproofing car road noise.
This enclosure uses special sound-deadening materials to keep the sound contained for your speaker.

Another option is Klipsch ME-800-C Speaker Enclosures (Amazon link). These are designed for 8-inch woofers.
Honestly, I recommend either one because they both perform quite well, and you’ll be happy with them without having to build a backbox yourself.

▪️ For In-Wall Speakers…
What I recommend here is the Dynamat En-Wall Enclosure (Amazon link). It uses those famed automotive sound-deadening materials, and you can find 4-inch and 6-inch wall options.
▪️ Let’s Compare…
Perhaps you’re at the stage where you’re trying to decide if you should go with in-wall or in-ceiling speakers and are wondering which is best.
Both of these are good options, and a backbox cuts down on your costs, makes it more effective, and you get extra layers to keep the sound where you want it.
Making your own backbox does take some time and some moderate woodworking skills. But you can get around that by buying one that is already made as I’ve discussed above.
Only you can decide what is right for you, but whether you build it yourself or buy it, do know that it’s a bit of a chore to cut holes in your drywall and ceiling.
If you’ve never done it before, you should make sure you know what you’re doing. For some of you, hiring help with that might be advised. Running those wires can get complicated, and you don’t want to mess it up.
If you’re good at building things, perhaps make your own backbox and then hire someone to do the install.

Do Ceiling Speakers Need Fire Hoods?
When there is a living space located above where the ceiling speakers are installed, building regulations may state a fire hood is required to be installed over the speakers. These fire hoods can also protect from acoustic sound transference.
You’ll want a fire hood for the simple fact that it surrounds the entire backing of the speaker to keep it from spreading fire in your ceiling.
As it is required by building codes to preserve your ceiling’s integrity in case of a fire, you should use it as it also is a form of backbox that prevents sound leakage.
If you’re having something professionally installed, this will all be explained to you as you work through the sales process.
If you’re doing it yourself, you might want to consult someone who is able to determine what is right.
You certainly don’t want to endanger your family or in a building, any other residents. Sometimes those low smoke or zero halogen speaker cables may be required too.
It’s all worth looking into, but at the very least, you can build your own back box now that you know how!
Conclusion
For both ceiling and wall speakers going into the build, using a backbox is very important. It keeps sound from traveling throughout your home or building, improves the sound, and protects your speakers.
If you’re making this much of an investment into a home theater sound system, you shouldn’t go without them.
This guide is to show you how to build a backbox yourself. You can also buy them ready-made.
Installation can be tricky though so you may want to cut your expenses by making that backbox on your own and then calling on installers to complete the sound system installation.