
The moment you suddenly start hearing crackling, popping, or any other strange sounds coming from your headphones, it can be a bit concerning. When this happened to me, my first thought was that it must be my headphones… but that wasn’t actually the case.
Why Are My Headphones Crackling and Popping (Solved)
The source material of your audio could be corrupted, or the media player EQ settings could be wrong. With the wrong settings, you could actually harm your headphone speakers. Make sure the bass or treble settings aren’t too high. If that doesn’t resolve the sounds, it could be a hardware issue.
The most common hardware issues you need to look at, could be a poor connection, faulty wiring, or another hardware device interfering with the connection.
In this guide, we take an illustrated look at how you can resolve popping or cracking noises. There could be a multitude of different reasons, and I’ll take you through each till you can find the solution to the issue.
Let’s Test Your Headphones or Speakers
Your hardware could be at fault here, and it’s best to make sure everything is working before heading to the software and settings. No use in updating drivers and messing around in the settings if the wires are frayed, right?
■ Identify If The Crackling Is Due To Your Headphones Or Speakers
Let’s hope this isn’t the cause as it would mean you need to probably throw your headphones in the recycling bin and get new ones.
If you are considering recycling the, I wrote an article that will help you find a recycling facility and identify what exactly can be recycled.
It is, however, quite easy to test the speakers and make sure the issue isn’t coming from there.
Just plug them into another computer that works fine. Try to play an audio file and listen closely to see if the popping or crackling sound persists.
If you can still hear it, then I’m sorry to say, but your headphones are on their way to headphone heaven.
There are 5 stages in dealing with loss, and you might be in the denial stage right about now… “But, how?”
This could happen when you listen to music on the highest volume for prolonged periods of time (also definitely not great for your hearing – I wrote an in-depth article about how headphones can make your deaf), or due to wear and tear (I’ve also had to say goodbye to some great headphones due to old age), or if you dropped it (looking a bit guilty there are we?).
That being said, if your headphones are still under warranty, it could be worth the effort to check if you can get a free replacement. Otherwise, it might just be time for new ones.
If you don’t want to give up on them just yet, let’s look at each individual part to see if there could possibly be something repairable.
■ Headphone Wire Damage
Your headphone wires, if damaged, could be the source of the problem. The wires are responsible for carrying the electrical signal to the drivers, where they get transformed into sound waves.
If, at any point, the wires are damaged, bent, or frayed, this can disrupt the signal and lead to crackling or popping noises.
Check your cable from the speakers to the jack, if you notice anything different, a kink or discoloration, you’ve probably found the source.
At this stage, your options are to replace the headphones completely or to refurbish them with a new wire (or an interim electric tape fix for a quick solution).
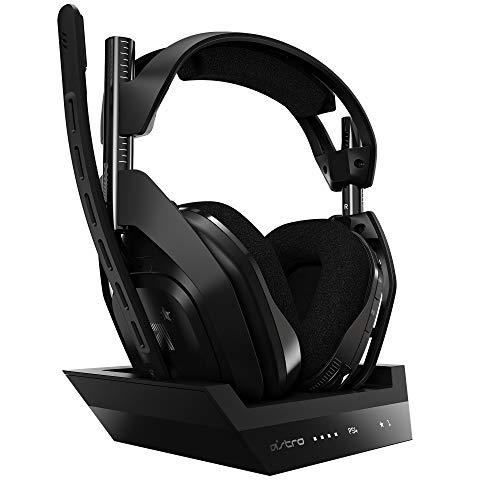
- Wireless Gaming Headset
- Dolby Audio
- Base Station
- Flip to Mute Microphone
- Compatible With PlayStation 5, PlayStation 4 & PC
To avoid damage to your headphones in the future, always place them in a safe space when not in use.
I love the Astro A50 Gen 4 exactly for this reason – it’s wireless, and it comes with a docking station, so it’s safe and I always know where it is when I’m not using it.
■ It Could Be a Headphone Driver Issue
No, I’m not talking about a software issue – it could be a driver hardware issue. If the crackling sound is accompanied by an overall quieter or distorted sound on one side of your headphones, odds are your driver is blown.
The driver is the brain of your tiny headphone speakers, where the electrical signal gets converted to movement and eventually produces sound.
We’re all guilty of putting our headphones (and subsequently our headphone drivers) in situations less than ideal… the bathtub comes to mind.
This could expose the drivers to moisture, or if you listen to music while jogging, sweat and dust could get in.
Even dropping your headphones could damage the drivers. If they’re new, it could even be a manufacturing flaw.
Your drivers can be replaced, and if everything else is still in a good working condition, you could definitely consider it. Check your manufacturer’s website to see if you can get parts directly.
■ Your Headphone Jack Could Be Damaged
Any connection issue could be a possible source of the sound, and your headphone jack is the father of all connections.
There are two things you need to check when it comes to the jack. Is it the actual jack that’s the problem or the AUX port.
To check, plug your headphones in another device. Make sure you’re pushing it all the way, if you’re not inserting it properly, it could result in a distorted sound.
If the issue still persists, you might need to replace the jack. If the issue is resolved, your device’s AUX port could be at fault.
▪️ Simply Cleaning the Aux Port Could Be the Solution:
- Take a cotton swab (or roll a piece of cotton into a thin string) and dip it into isopropyl alcohol.
- Gently remove any excess alcohol until the cotton is just damp.
- Insert it into the port, starting at the outside edges, and moving progressively deeper until you’ve cleaned all the way to the back.
- DO NOT insert a metal object to try and remove any dirt. Sharp objects can damage the connection and ruin your AUX port.
- Once all the dust and dirt is removed, wait for the alcohol to evaporate before using the port again.
This should solve the issue, and if not, we’d better take a look at the software.
Try Running the Audio Troubleshooter
Once you’re sure the problem isn’t with the hardware, it’s time to test the software and settings. The windows troubleshooter is a great place to start, as it often diagnoses and resolves issues faster than I can.
And, even if you’re a computer buff, it could save you some time.
To start the troubleshooter, type the words “Troubleshoot settings” in search. Select “Troubleshoot settings“ from the list.

Next, under “Get up and running“, there is a troubleshooter for “Playing Audio“. Choose to “Run the troubleshooter“.
A window will appear, and now you can simply follow the instructions. Windows does all the hard work, running through all the possible issues, and fixing any sound problems.
See if this fixes the crackling sound problem.

If it prompts you to do anything, like manually update the drivers, we move on to the next step.
Software-Related Issues That Can Cause Headphone Crackling
Sometimes the Windows troubleshooter will identify issues that still require a manual human touch.
Updating the drivers from the manufacturer’s website, getting the settings just right, and disabling/activating certain functions could all help resolve the problem.
■ Update Your Sound Drivers
When using your headphones with your PC, outdated driver software for your sound card could result in a popping or crackling noise.
You can find the latest driver updates by going to the website of either your PC manufacturer (if it’s a built-in soundcard) or the sound card manufacturer if it’s an additional card.
Very important to keep in mind is that you need to download the sound driver version compatible with your operating system.
Choosing the wrong version will be a waste of time as it either won’t install or it just won’t solve your problem.
Check your operating system processor by searching for “operating system” in the search bar. The most common processors are a 32 or 64-bit processor.
■ Poor Equalization Settings (EQ)
Your media player’s equalization settings can have a huge impact on your overall sound quality. When they’re a bit off, it can result in sound distortion, and other sound anomalies.
When settings like the bass or treble are too high, except for completely busting your speakers, it could also damage your hearing!
Therefore, don’t pump up the volume too much or try to get that killer bass by fiddling with the settings. Try to reset the settings to the default, and see if that resolves the issue.
If you’ve reset it and the problem persists, your EQ settings probably aren’t the issue. Alternatively, your speakers could be permanently damaged, but that is highly unlikely.
The answer could lie in your sound format – and in my opinion, this is the most likely cause of all your issues. Let’s take a look
■ Disable “Exclusive Mode” and Change the Sound Format [The Most Likely Issue]
The elusive “exclusive mode”… not many people know about this sneaky little mode that can mess up your entire audio experience.
I’m pretty convinced that if you have this enabled, you can bet your bottom dollar it’s the cause of your sound issues.
So, what is the Exclusive Mode? It’s a function that allows a specific app to take control of your audio while in use, effectively blocking any other devices from playing audio.
It’s great when I’m meditating with an app, as I definitely don’t want my phone to start ringing in my ears just as I reach nirvana, but it can be a pain when I forget it’s on and try to do other things.
It can also interfere with the audio drivers, get them all confused when they don’t know who to take commands from, which leads to broken audio sound.
So, to disable the Exclusive Mode:
1) Locate the right control panel setting that will give you access (this is important). There are two ways you could get to the exclusive mode setting.
a. Click on the Windows key and search for “manage audio devices”.
Depending on the system you have, you could get “manage output devices” or “manage sound devices” — but don’t worry, your computer should show you the right option.
It should then look like the option below. If you can move on to step two and “right-click” on the “speakers” option, then continue with step 3.
If you can’t, then look at option B.

b. Right-click on your speaker icon in the right bottom corner of your screen.
Select “Open Sound Settings”.

Next, look at the top right corner where you’ll see “ Sound Control Panel” under “related settings”. Open it.
This should take you to a new window where you can “right-click” on the speakers.
Don’t ask me why this has to be so complicated, ask Windows. Great, so we’re all at the same place — Step 2.

2) When you right-click on the headphones/speakers, a list of options should pop up. Select Properties.

3) Once the properties window opens, go to the Advanced tab.
Now, un-check the ”Allow applications to take exclusive control of this device” box – and you’re back in control.
Click Apply to accept the changes, and OK to exit.

4) Test your new-found control by playing some music. If the sound is snap, crackle, and pop free — Play some music and check if the sound coming through is noise-free now.
If not, there’s one more change we can make to the Windows default sound format settings. Step 5 below.
5) Change Your Sound Format
There have been quite a few default Windows settings that have contributed to my thinning hairline. Initially, I thought it was my headphones… but after doing some research, I’m not so convinced.
Changing the Windows default sound format has solved the issue for countless people, so it could be the solution for you too.
5) Change the default audio format – to do this, go back to the Advanced tab and change the default format to 16 bit, 44100 Hz (CD Quality). Remember to “Apply” the changes before exiting.

This should resolve your audio issues, I’ve helped quite a few friends, and it always came down to the Exclusive Mode.
The default format could be a bit of a trial and error exercise if it isn’t working as well as you had hoped. Just play around with a few options and take note of the effect.
■ Your Processor State Could Be Too Low
Many of my friends have reported success in resolving strange sounds by adjusting the minimum processor state. Follow these simple steps to test this easy method for solving your sound issues:
1. Press the Windows key on your keyboard and R simultaneously. The Run feature will pop up. Copy and paste this string into the search bar – powercfg.cpl. Hit Enter.

2. This should take you to the Power Options. Change your power plan settings from balanced to High performance.

3. In the High performance setting options, click on Change advanced power settings.

4. Click on the + sign next to the Processor power management (or double click) to get the dropdown.
Change the setting for Minimum processor state to 100 next to Setting (%).
Click Apply and finish by clicking on OK.

Depending on your version of Windows, you could also see On battery or Plugged in next to Setting (%). Make sure to change these values to 100 also and Apply the changes.
Don’t forget to do the same for the maximum processor state.
5. As always, restart your computer to help the settings take effect, and plug in your earphones to finally listen to some uninterrupted sweet sounds. Audiophiles rejoice, we have overcome.
I hope that solved your problem and that a new set of headphones won’t be necessary.
If it is, see it as an opportunity to upgrade, some of the models available today are just off the hook.
Always a silver lining, right?