
It’s frustrating to have your AirPods keep cutting out. You’re jamming to your favorite song or listening to an audiobook, enjoying the moment, when you suddenly get audio gaps and distortion.
You might wait for a moment or two to see if the issue resolves itself. When that doesn’t work, the fiddling starts.
You could play with the AirPods in your ears a little, maybe check the settings on your device, or even smack it a couple of times.
With the information in this guide, you’ll learn the steps you can take to ensure that you can fix the problem of having your AirPods cutting out.
Why Do My AirPods Keep Cutting Out?
AirPods communicate by using Bluetooth technology. When the signal gets interrupted, it can make it seem like the audio cuts out. Most issues can be solved by moving closer to the root device or disconnecting the AirPods before reconnecting them again. Any obstructions can interfere with the signal.
If the sound from your AirPods keeps cutting in and out or has frequent distortion problems, the first fix to try is to improve your Bluetooth connection.
Bluetooth headphones keep cutting out because signals can be weakened or experience interference in some situations.
Your AirPods could lose their connection more often when streaming audio from locally stored content on the device. When it’s within a few feet of you, try listening to something you’ve saved.
- Open the Music app on your iOS device. If you’re using macOS Mojave or earlier, you’ll need to open iTunes.
- Play a song from the app that doesn’t have the download button next to it. You also have the option to press the download button to store the file on the device.
- Suppose your AirPods maintain their connection without distortion while performing this test. In that case, you can fix the problem by keeping the device away from obstructions, microwave ovens, wireless speakers, or unshielded cables.
- Check to see how active the Wi-Fi networks are in your area. When lots of people use Bluetooth or wireless in a limited space, interference can occur.
When your headphones maintain their connection without any distortion or cutting out during this test, you can do a couple of things to help your listening experience in other situations.
First, try to keep your device close to you. That will stop floors, walls, and other obstructions from interfering with the audio.
You can also move to a different location. If the microwave or a wireless speaker interferes with the Bluetooth connection, try shutting those items off before trying the AirPods another time.
What If My AirPods Keep Disconnecting?
If you’ve tested your AirPods and the audio keeps disconnecting, cutting in and out, or creating silence, the best way to fix that problem is to unpair them before pairing them again to the same device.
Here are the steps you’ll need to follow to successfully unpair your AirPods from your device.
- Tap the Settings icon from your iOS device.
- Select the Bluetooth option from the menu.
- Find the device you want to unpair, then tap the Info button. It’s colored blue and has an “I” inside a circle.
- Choose to Forget the Device.
- Restart the iOS device.
If you’re not using an Apple device with your AirPods, you’ll need to go to your Bluetooth settings to ensure that they’re turned on to use. Once you get into the settings, you’ll need to unpair or forget the headphones before restarting the phone, tablet, or PC.
When you use an iMac or a MacBook, you can click on the Bluetooth icon at the top right of the screen. Choose the Bluetooth Preferences selection from the dropdown menu. You’ll then pick up the unpairing process at Step #3.
After your iPhone, mobile device, or computer completes the restart process, you’ll need to pair the AirPods to the device again.
You can get that job done by following these additional steps with an iPhone.
- Update the iPhone to the latest version of iOS. This step may cause the device to restart once or more. Follow all the onscreen instructions before proceeding to the next step.
- Open the charging case of your AirPods. Hold them next to the iPhone. You’ll see a setup animation appear on your iPhone screen.
- Tap the Connect command. If you have second or third generation AirPods or AirPods Pro and you’ve set up Siri, you’ll be finished. If you haven’t taken those steps, you’ll need to complete that part of the setup.
- Select the Done command.
If you’re already signed into your iCloud account, the AirPods will set up automatically with your supported devices that use the same Apple ID.
How to Pair AirPods to a macOS System
If you use an iMac, a MacBook, or a Mac Mini, you’ll need to install the appropriate operating system to ensure the AirPods stop cutting out.
- You must have macOS Mojave (10.14.4) or later for the second generation AirPods.
- The third generation AirPods require macOS Monterey or later.
- AirPods Pro require you to be using macOS Catalina (10.15.1) or later on your device.
Did you set up your AirPods with an iPhone, and both the mobile device and your computer use the same iCloud ID? Your AirPods are already set up and usable on macOS if they do. Place them in your ears and click the Bluetooth menu icon or the volume control in the menu bar.
If you’re using a Magic Keyboard, you can also tap the volume control above the “Delete” key to make adjustments. Choose AirPods from the list.
When you don’t see these options or the icons are not available to click, you can still pair your AirPods to a macOS device by implementing the following steps.
- Choose the System Preferences option from the Apple Menu. You can tape the Apple button on your keyboard or click the icon in the upper left corner.
- Click the Bluetooth option when it appears.
- Make sure that the Bluetooth feature is turned on and ready to use.
- Place the AirPods in the charging case and open the lid.
- Press and hold the setup button on the case’s back until you see the status light flash to white.
- Choose the AirPods from the Devices list.
- Click on Connect.
- If you hear sound playing from the Mac speakers, choose either the Bluetooth menu or volume control in the menu bar. You’ll need to ensure the AirPods are selected as the output device.
Once you have your second generation AirPods, third generation AirPods, or AirPods Pro set up, they’ll automatically switch between macOS Big Sur devices, iPhones operating iOS 14 or later, or iPads using iPadOS 14 or later.
Each device must be signed in to your Apple ID on iCloud to take advantage of this feature.
Your devices will require two-factor authentication to complete the process. Once engaged, you can listen to music on your iMac, answer a call on your iPhone, or switch to an iPad for other needs.
You might see a notification about your AirPods on macOS. When you hold the Magic Mouse pointer over the information, a Connect button might appear.
You’ll need to click on it to confirm that you want the AirPods to switch or stay with the Mac connection.
Users can turn off the automatic switching for Mac through the Bluetooth preferences menu. Click on the Options button with the AirPods in your ears. Choose “Click to This Mac.”
Then choose “When Last Connected to This Mac.” You can always turn the switching feature on again by selecting “Automatically” at the final step instead.
What If I Don’t Use Apple Products Other Than AirPods?
AirPods users have the option to use the headphones as a Bluetooth headset with non-Apple devices. This choice won’t let you use Siri, but you can still listen to audio, talk on phone calls, and use the other traditional features.
You’ll need to follow these steps to complete the pairing process when you’re using AirPods with a non-Apple device.
- Go to the Settings for Bluetooth. Make sure that the feature is active and working. Android devices have you go through Settings, then Connections, to reach the Bluetooth menu.
- Open the lid to the charging case with your AirPods still inside.
- Press and hold the setup button on the back of the case until you see the status light start flashing white.
- The AirPods will appear in the list of Bluetooth devices. Choose them to activate their features.
My AirPods Won’t Connect to My Device
If you need help connecting to your AirPods, these steps will help you ensure that they can work with your Apple device.
- Ensure that you’ve got the latest version of your device’s operating system. If you’re not using iPadOS 14 or iOS 14, newer AirPods might not connect as expected.
- Place both AirPods in the charging case. Make sure that they’re both charging before going to the next step.
- Ensuring that your Bluetooth feature is turned on with your Apple device.
- It’s not unusual for the AirPods to connect, but not provide any sound. That happens when they’re not selected as your audio device.
- Close the lid and wait for 15 seconds. Open the cover again, press and hold the setup button on the charging case for ten seconds, and wait for the status to flash white. That means the product is ready to connect.
- Hold the charging case with the lid open and AirPods inside next to your Apple device.
- Follow the steps that appear on your screen.
- Test your AirPods. If they still don’t connect, you’ll need to put the headphones through a formal reset.
When your AirPods refuse to connect, they likely need to be reset. You’ll need to place them in their charging case and close the lid. Wait for at least 30 seconds before opening the cover to the charging case.
Once you’ve waited enough time, tap the More Info button in the Bluetooth menu next to the AirPods. Tap the option that says to forget the device.
You’ll need to tap a confirmation that you want to forget the AirPods.
With the charging case’s lid still open, you’ll need to press and hold the setup button for about 15 seconds. You’ll see the status light flash an amber color first before turning white.
At this stage, you’re ready to reconnect your AirPods to your Apple device. They should still be in the charging case with the lid open. Follow the steps found on the screen of your iPod Touch, iPad, or iPhone to finish the reset.
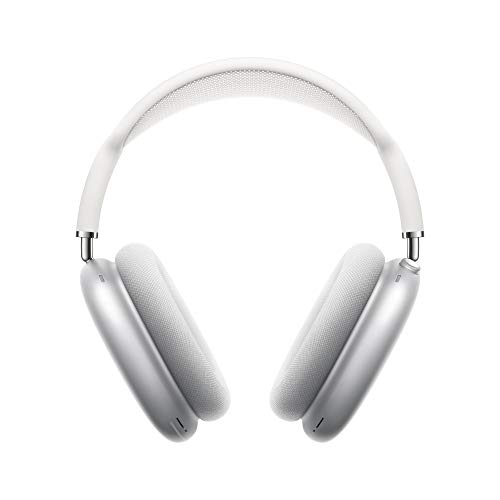
What If I’m Having Trouble with My AirPods Max?
AirPods Max are wireless headphones Apple released that provide an over-the-ear user experience. Some people don’t like the look or feel of the original AirPods, making this product a viable alternative that still delivers excellent wireless connectivity.
If you’re having trouble with the AirPods Max headphones connecting, you’ll need to follow the same steps to connect regular AirPods by Bluetooth to your preferred device.
When none of the unpairing and re-pairing steps work, you might need to reboot the headphones to enjoy the benefits of listening to the AirPods Max again. You can accomplish that outcome by implementing these procedures.
- Make sure to charge your AirPods Max for a few minutes before starting the reboot process to ensure there’s enough power to have a successful experience.
- Press and hold the Digital Crown and the Noise Control Button until you see the LED flashing an amber color.
- Connect them to your iOS or iPadOS device or your Mac.
You might need to unpair the AirPods Max from your iCloud account before the reset process will work to restore functionality.
Are AirPods Worth the Investment?
AirPods are popular because they’re easy to use, lightweight, and provide a reliable connection. You get to bring Siri to life in more ways while receiving an excellent listening experience. Although they work best when paired with Apple products, you can use them with any Bluetooth device.
I used to buy about three pairs of Bluetooth headphones each year. Since I listen to music about eight to ten hours per day while working, the products would just wear out on me.
Even the high-quality earbuds and over-the-ear headphones struggled under those conditions.
When Apple released the AirPods Max, I jumped at the chance to use them. The dynamic driver designed in-house provides one of the best Hi-Fi experiences I’ve ever heard, while the active noise cancellation is enough to block the traffic noises outside my office.
If I’m working while the family is at home, the transparency mode lets me hear their questions while still listening to my favorite songs.
I switch between Apple devices a lot because I tend to be mobile while working. The AirPods Max makes it an effortless process to continue the listening experience.
They provide on-head detection, theater-like sound, and dynamic tracking to deliver a realistic concert-style experience.
They also give me between 18 to 20 hours of listening time on each charge. The most I’ve ever gotten from my AirPods is about five hours.
If you’re looking to enjoy a wholly encompassing listening experience, AirPods Max or the other entries in this brand series deliver a positive result. I haven’t had to buy another set of headphones since I made the upgrade.