
One of the best experiences in life is to bring home a new home theater sound system. When you set up those speakers, the anticipation of re-watching your favorite movies or enjoying live sports in new ways gives you a warm and fuzzy feeling.
When you start hooking up the speakers, you’ll notice that plenty of wire trails from the back. What happens if you can’t reach your hub from the installation position needed for the best listening experience?
Although you could invest in a wireless system, knowing how to splice speaker wire ensures that you get the appropriate distance for any compatible setup.
What Is the Best Way to Splice Speaker Wire?
The best way to splice speaker wire is to use an in-line electrical crimp connector. Sometimes called a butt connection, this method is more secure than twisting the wires together with electrical tape as the binder. Tape wears out as time passes, and tugging separates the connection in ways a crimp resists.
Crimp connections are meat for stranded speaker wire. If you’ve got solid core at home, you’ll find that the electrical tape method is a bit easier to use. You can still use an outer wrap that shrinks to protect the connection to prevent it from unwinding.
If you’re installing outdoor speakers, don’t forget that your connection must be weatherproof to prevent damage from happening to the wiring and the other electronics.
Here are the steps to follow so that you can have a successful experience setting up your speakers for a home theater or a surround sound system.
Step #1: Set Up Your Equipment
Before you start the wire splicing process, it’s crucial to correctly place your speakers and other equipment.
- Turn the power off to your home stereo receiver.
- Disconnect the power cords.
- Unplug all the speaker wires, examining them for quality.
Any wiring that looks to be in disrepair or in poor condition should be thrown out immediately.
Move the speakers to your preferred location. If you have the time, you can think about how disguising or hiding your wiring can happen in the living area. They can be out of sight without resorting to a wireless setup with the proper techniques.
Step #2: Measure the Distance and Cut the Wire
Once you have the speakers placed in the position you prefer, measure the wire length you’ll need to connect each one to the stereo system. Although you can use a measuring tape, it’s usually easier to work with string or twine.
Stretch the string from the speaker to the system. Mark the length with a marker that you can see. From there, you can match up the wire length on a flat floor to ensure you’ve cut the correct amount.
If you’re ever unsure about the measurement, even when doing it twice or more, it’s always better to overestimate what you need. A little trimming never hurt anyone.
Repeat this step for each speaker you need to connect to the system. If you have wires that don’t require any splicing, it helps to label them now. Set them aside so that you can work on creating the length you need.
Step #3: Strip the Wire and Attach the Connectors
Take the first set of wires that need to be spliced. Place the terminals (the ends) next to each other, keeping the positive and negative together.
The wires must be in-phase for this step to be successful. If you’re unsure, you can test the speaker wires with a battery.
- Lightly hold up the end of the wire against the side of the battery.
- If you have the positive wire connected to the positive terminal, you should hear your speaker make some noise. When things stay quiet, the positive is on the negative or reverse.
- After identifying this information, you’ll want to ensure the wires are connected to the appropriate ports.
Use wire cutters to strip off the exterior insulation or jacket. The four ends should have at least a quarter-inch measurement of copper wiring exposed when you’re finished.
Since you can separate individual wires by an inch, you’ll have enough room to get the job finished.
Take both negative ends of the bare wire, inserting each one into opposite ends of the crimp connector.
If you’re using electrical tape, give this joint a firm wrapping. Then use the crimping section of the wire cutters to squeeze the area so that the tubing shuts closed around the wire. Repeat on the other end.
Do the same for the positive connections.
Once the wires are connected, give them a gentle tug to ensure that your joint holds. It often helps to double-check the electrical connection with a battery to ensure everything is where it should be.
Step #4: Apply Heat to Shrink the Connections
After attaching the crimp connectors to the appropriate wire ends, you’ll want to apply a gentle heat source to the outer wrapping. Your best option is to use a blow dryer with a high heat option.
You can also use a hot air gun, but the temperature setting can be too high on some models at the lowest level.
- Hold the wires in your off hand, just a few inches below the connection while applying the heat.
- Slowly rotate the wires so that you can start shrinking the crimp on all sides equally.
- Once the connection is secure and tightly wrapped, the casings deliver a snug result that should be waterproof.
Some electrical crimps come with a small dab of solder in the middle to help fuse the wires together better, creating a more secure connection.
Continue with the steps of stripping the wires and attaching the connectors until you’ve got all the lengths spliced and extended based on the necessary measurements.
Step #5: Reconnect the Speakers
Once the wires are correctly spliced, the last step is to connect your speakers to the stereo amplifier, receiver, or home theater system.
You might consider making the connection more secure by installing a speaker wire connector, such as a banana plug, spade, or pin. They make it a lot easier to plug the wires into binding posts or spring clips.
If you want to install a speaker wire connector, these additional steps become part of this final effort to connect your system.
- Strip the amount of wire away that’s recommended by the conductor manufacturer. Most products need at least 12 mm.
- Remove the outer section of the banana plug or the connector’s manufacturer. This process usually requires a twisting motion that reveals the product’s inner chamber.
- Loosen the locking fasteners on each plug, careful not to take the screw out entirely during this step.
- Insert the speaker wire into the banana plug with the least amount of force possible. Keep going until you feel the wire touch the end of the chamber.
- Tighten the locking fasteners by turning the screw in the other direction.
- Replace the connector’s outer section to conceal the inner chamber. Your wire is ready to use the banana plug, pin, or spring clip on the binding post instead of using a direct wire connection.
Once you’re finished finalizing the connections, you’ll want to test the stereo system to ensure that each speaker works correctly.
If one of them isn’t operating as expected, you’ll want to check on the speaker and receiver connections found there to ensure that everything is tight and secure.
What Is the Best Way to Strip Wire?
Although you can strip wire with something as simple as a kitchen knife, it works better when you have a specific tool available for this job.
Sharp blades can damage the copper wire underneath the outer shell, leading to unexpected issues with sound quality in the speaker.
I like to use the StarTech RJ45 RJ11 crimping tool for this work. It comes with a cable stripper that makes it relatively easy to work with any wire type while providing a crimping tool for a successful splicing experience.
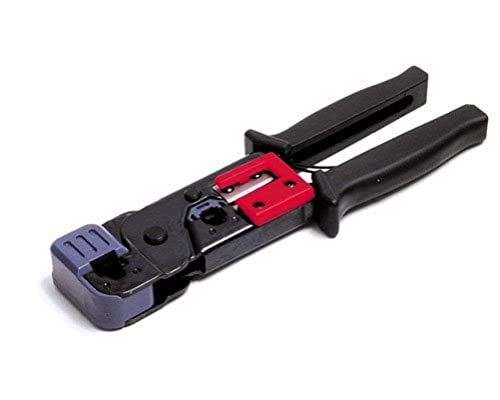
Some brands put different holes on the outside of the tool for your speaker wire gauge. You’d want to place a length in the device, squeeze it enough to hold it tightly, and pull the wire out.
It can be tricky to strip wire at first because you need the right combination of pressure and pulling to have a successful result.
If you have 20 or 24 AWG speaker wires, the thinness of the design can be a struggle to strip. When you squeeze a wire stripping tool too hard, you can break off some or all the wire strands.
Try to practice on something other than your speaker wire first; you’ll encounter fewer errors with your wiring work.
What If I Want to Solder My Speaker Wires?
If you know how to solder connections, this option can provide a secure finish that you can cover with electrical tape. You don’t want to leave a soldered link unprotected because any moisture or skin contact could damage the equipment or cause a personal injury.
The electrical tape must extend for a couple of inches beyond the soldered connection to ensure you have an appropriate amount of insulation available for the link.
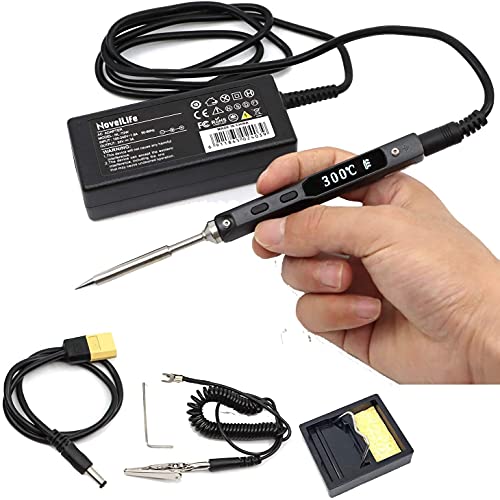
For those who want to use this method for splicing and connecting speaker wire, you’ll need a soldering iron and some solder to use.
I prefer the NovelLife TS100 kit for this work because it offers an adjustable temperature, appropriate safety circuits, and a comfortable grip. If you can write with a pen, you can learn how to use this tool.
Once you have the equipment, these steps can let you solder the connection successfully.
- Cut and strip the speaker wire. You’ll need at least a half-inch of space available to ensure the solder has enough room to work.
- Hold both ends of the wire so that they form an “X” shape. Each wire should be facing the opposite direction.
- Hold both ends firmly. Tightly twist them around each other until they’re completely wrapped over one another.
- Heat the soldering iron.
- Once the tool is ready to use, apply some heat to the wire with the soldering iron’s tip for a few seconds.
- Apply enough solder so that it flows entirely through the wire.
- Rotate the wire to the other side and apply solder in the same way until the joint is saturated.
- Allow the solder and wire to cool for about a minute.
- Wrap the joint with electrical tape, starting the insulation at an angle, ensuring that everything is as tight as you can safely make it.
If any part of the copper wire remains exposed, you could create a short circuit that might permanently damage your speakers or other system components.
How to Splice Speaker Wire with Wire Nuts
Wire twist connectors are often used for wiring installation in homes and commercial buildings. They’re a little less reliable for speaker wire because of their size restrictions, but it is an option to consider if you need a quick fix.
When using the twist connector option, it’s essential to have both wires firmly together before finalizing the work. That’s why it helps to combine the two wires like you would for soldering, but they should face upward like an arrow instead.
Once you have the copper wires combined, you would twist a connector of the appropriate size to have them stay together. You can then seal this connection with electrical tape to prevent a short from happening.
If you don’t secure the twist connector, it can come loose. That’s why the crimp connection is typically recommended over this option.
Why Can’t I Just Twist and Tape My Speaker Wires?
When speaker wires get exposed to the environment, the risk of a short circuit rises. If anything should happen before a repair happens, the amplifier, stereo, or speaker could be damaged. It’s not worth the risk when more secure options, such as crimp connections or soldering, are available to use.
If two speaker wires are twisted together in a straight-line connection, they’ll eventually pull apart. That’s because the electrical tape does a better job of providing insulation than serving as an adhesive.
As time passes, I’ve found that the joint pulls apart underneath the tape. It can happen with no warning.
When your system is close to baseboard heating or a furnace vent, the extra heat can impact the electrical tape. It’s not unusual for the product to unravel, putting you right back at the beginning of this process.
Electrical tape can leave behind unwanted residue on the spliced speaker wires that can be challenging to remove.
Some speakers clearly label the positive and negative wires. You can also tell by the insulation color, although you don’t want to assume that the red one is always positive.
If you have one gold wire, that’s a good indication that it is positive and the other is negative.
Once you’ve got everything set and ready to go, it helps to have some spare speaker wire available to finish your installation. I’m a big fan of GearIT’s 12 AWG pro series spool.
It’s effortless to use, offers 65 strands under the jacket, and is compatible with virtually any connector.

Splicing speaker wire is a relatively straightforward project when you have a plan to follow. Get the tools, follow these steps, and take the guesswork out of the process.