
Raspberry Pi is one of the best computing options you can find today. This low-cost microcomputer runs Linux, delivering an almost endless number of potential extensions.
The original Raspberry Pi was meant for educational programs and environments, but it has become a popular DIY resource for numerous projects. When you have the right extensions, you can build virtually any setup with it.
One of the best options for a new Raspberry Pi is to turn it into an audio streaming box. This guide takes you through the steps to create this resource at home.
Raspberry Pi Audio Streaming
The Raspberry Pi audio box requires a Raspberry Pi B or a newer version. Choosing the B+ model ensures users receive four USB ports, 512 MB RAM, and a 700 MHz CPU. It helps to have a micro-SD card, case, power supply, and Wi-Fi adapter to ensure seamless streaming occurs.
Before you start the building process with your Raspberry Pi, it helps to gather all the supplies you’ll need to complete the job.
The table below takes you through each item needed for a successful experience.
| Raspberry Pi Equipment | Reason Why You Need This Raspberry Pi Component |
| Raspberry Pi B, B+ or Newer | • The best audio boxes from Raspberry Pi need a 100 Mbit ethernet port, enough memory to process the information, and a processor fast enough to deliver the results you want. |
| Raspberry Pi Case | • You won’t receive any protection from environmental elements with a core Raspberry Pi system. • Having a case to protect the components serves a practical purpose while helping the equipment look better. • You won’t need visual contact with the audio box to have a successful experience. |
| MicroSD Card Addition | • The Raspberry Pi computer requires an SD card to store its operating system and serve as internal storage. • If you want to store music on your device, you’ll want to purchase enough memory to handle all your needs. • An 8 GB Class 10 card should be your minimum investment here. |
| Power Supply | • Your Raspberry Pi needs a power supply. • That delivers enough power. Since each model has different requirements, you’ll need to review the specs for the device in your possession. • A 2A option works well if you’re running the B+ model. |
| Wi-Fi Adapter | • Depending on where the audio box is at home, you might need access to your wireless network. • A simple USB adapter works well for this process so that you don’t need to rely on the ethernet component only. |
Once you have your items gathered, you’ll be ready to follow these steps to put together your Raspberry Pi audio box to enjoy some streaming.
Steps to Follow to Create Raspberry Pi Audio Streaming
The Raspberry Pi systems have struggled to compete with tablets and smartphones as an audio streaming option. Why go through the effort to build a system when your phone already has access to your favorite music apps and files?
Older Raspberry Pi models struggled with the 3.5 mm analog audio jack because of the static and feedback. That’s why using at least the B+ model is worth considering.
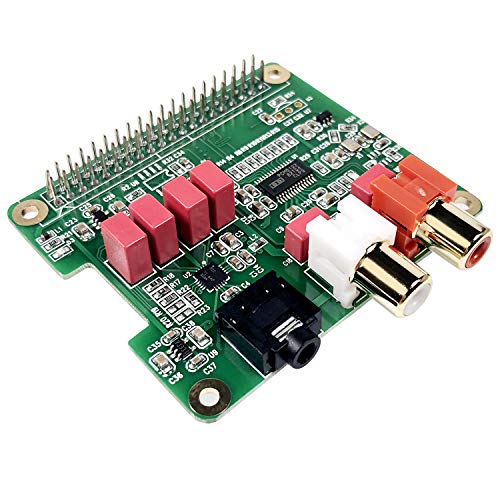
You can also use a USB sound card to improve the audio quality of some Raspberry Pi models. If you’re looking for an audiophile experience, the InnoMaker HiFi DAC uses an excellent board that delivers an impressive outcome.
You’re now ready to put the hardware box together. It only takes a few hardware skills to get the work finished, which means the assembly work is usually done in about 15 minutes.
Step #1: Prep the SD Card
Once you have the hardware for the Raspberry Pi assembled, you’re ready to work on the software components of your audio box.
That means you’ll need to get the SD or microSD card (depending on your model) prepared to serve your needs.
- Plug the memory card into your computer using the equipment you secured to complete the build.
- Download Pi MusicBox or another free software option that enables audio streaming on your setup. You’ll need to use the Win32 Disk Imager or equivalent program to write it directly to your internal memory.
- Install the software once you’ve received the notification it has finished downloading.
- Run the software, choosing the correct drive letter setting device to avoid erasing it accidentally. Choose the unzipped .img file to write to the SD card.
Step #2: Connect to Your Network
If you’re using an ethernet connection with your Raspberry Pi, you’ll complete this step by plugging the line into the device.
When you need to use your Wi-Fi network, you’ll need to enter the settings for your wireless network in the config file.
- Open the file settings from the config folder of your SD card in a text editor.
- Enter the SSID (network name) for your Wi-Fi, along with the password, in the appropriate fields. Don’t forget to save the file after entering the information.
- Pi MusicBox and other audio streamers often support WPA, but not WEP, Wi-Fi. You’ll need to make adjustments if you don’t have the appropriate option to ensure you can listen in the way you prefer.
- Remove the SD card if you entered these settings on a PC. Your Raspberry Pi should now recognize Wi-Fi availability.
Step #3: Configure Your Audio Box
Every streaming option available for Raspberry Pi has a different set of steps to follow. Although the following requirements are generalized, they apply in some way to each software option currently available.
- Plug the Raspberry Pi into its power supply.
- Give it some time to complete the booting process.
- Once the boot cycle is complete, open the web browser on your system. You’ll need to enter the URL for the home page or access area of your preferred streaming service.
- Click on the settings option to ensure that your configuration matches the hardware profile of your setup. You might need to re-enter some of your passwords to ensure complete access.
- Some networks require a workgroup or to have SSH enabled, especially if you plan to make advanced changes to your Raspberry Pi system.
- Configure the device name for your system. Enable the autoplay option if you want to have the audio stream automatically.
- DLNA or UPnP protocols might need to be enabled.
- If you plan to use macOS or iOS software to stream music from one device to the Raspberry Pi, you might need to enable AirPlay streaming to have a successful experience.
Step #4: Set the Volume
The best way to get the volume at a level you prefer with your Raspberry Pi is to start at 100. Use your amplifier’s settings to make changes to the volume instead.
You’ll get better overall audio quality by using this method. Some users can have the automatic settings work without creating problems.
Finally, you’ll want to disable the Downsample USB setting if you’re using the B+ or a newer Raspberry Pi – or an audio card.
Step #5: Get Your Music Files
Most audio streaming resources on Raspberry Pi will automatically scan for music files after rebooting your system. It might be necessary to enable this feature before it will work.
If you enable automatic scanning, it will look through every attached network, USB, and SD drive. That process can take a few minutes, especially if you have low memory or slow processing speeds with your Raspberry Pi.
Some users might have a network drive where the files exist. You can chart a folder map to where the information exists to streamline this process.
A few software options can get audio files from streaming services. Others can broadcast information sent from a specific URL or audio source to stream different playlists or folders.
Step #6: Prepare Your Local Music
Raspberry Pi provides several options for adding local music. The easiest method is to copy them from a computer, smartphone, or tablet to an SD or mSD card that your equipment can read.
You can also use a USB drive that attaches to the system to play audio.
You can let your Raspberry Pi scan a shared folder with the appropriate software to pull information from the network.
Step #7: Reinforce Your Security
Raspberry Pi audio streaming options are typically built to run within your local network. Putting it outside your firewall would allow anyone from the outside to have access to your setup.
You’ll need to evaluate local requirements in this step to ensure your profile receives the security reinforcement needed to keep your information safe.
Pros and Cons of Using Raspberry Pi
Every technology comes with a series of pros and cons to evaluate before investing in it. When looking at the Raspberry Pi, here are the points to review.
| Advantages of Using Raspberry Pi | Disadvantages of Using Raspberry Pi |
| It works well for those who have a tighter budget, especially if audio playback needs require automation. You won’t be dealing with the higher pricing that brands like Apple and Samsung require to access hardware. | This setup for audio streaming does not replace what a computer, laptop, or mobile device offers for music access. You’ll need to acquire materials to create an audio box instead of having a plug-and-play experience. |
| The technology doesn’t require users to have extensive programming or development experience. It uses Python for commands, which means fewer complex commands are necessary to create results. | It can be a time-consuming process to download and install the audio streaming software because of the slow processing speeds found on most systems. |
| Users have plenty of room to experiment with how they listen to music, ranging from different audio cards to independent speakers. | Unless you’re using Linux on other systems, your setup won’t be compatible with the other equipment you’re using at home. |
| Software installation changes are unnecessary when repurposing the setup for a different need. The adaptive tech lets you play videos, display images, and even play games. | The Raspberry Pi board doesn’t come with pre-applied heat-sinks or a cooling fan. If you’re using the 4, it’ll start getting hot when you don’t take care of dissipation needs. You’ll need to take a break after 5-6 hours of listening. |
| The small size makes it easy to use almost anywhere, especially when it comes equipped with a portable power source. You can slip it into a pocket or bring it in a case with you to enjoy audio streaming with local files. | If your music streaming service requires a graphics interface, you’ll need to install a GPU on the Raspberry Pi. It doesn’t come with one when purchasing it as a base unit, although some kits do offer it as a feature. |
A Final Thought on Using Raspberry Pi for Audio Streaming
Raspberry Pi provides an affordable audio streaming alternative for anyone who wants to listen to local files. It doesn’t require a network connection if you can transfer music, podcasts, and other data from a computer or mobile device to your B+ system or higher.
I originally got involved with Raspberry Pi building as a way to stay connected with my dad. He’s an electronics junkie who always has a spare power supply for the odd project lying around. Over the years, we’ve built several computers together, including more than a few Pis.
These days, I have fun experimenting with the creation of Hi-Fi sound while keeping the equipment as Lo-Fi as possible. It’s interesting to see how the different audio cards make changes to the output you receive.
The information in this guide is based on my personal experience. I’ve found the processes to be helpful, but I recognize that each person needs to follow a path that makes sense for their needs.
Raspberry Pi, in my opinion, is one of the best tech inventions in history. Once you create an audio streaming resource from this technology, I think you’ll agree that it’s a lot of fun to enjoy music and more with this little device.