
If you have a turntable or a record player at home, you’re enjoying the warm love that music on vinyl produces.
Although different Hi-Fi and audiophile options deliver incredible depth and realism, something is comforting about what plays from a record.
It’s like enjoying the best casserole your mother makes or having your dad’s chili. Other people might make it better, but you love what comes from your family because it is comforting and made with love.
Playing or handling a record is a serious and delicate business. If there’s a track you want to skip, it isn’t as easy to push a button or tap a command
How to Skip Songs on a Record Player
Gently lift the tonearm with the cue lever while the record rotates. Count the ring number on the recording surface as these correspond with the different tracks. While using the least amount of force possible, gently lower the tonearm to the surface to the point where the path begins.
The best practice is to avoid moving the turntable stylus unless there is no other option. Each time you raise or lower it, you’re risking damage to the record, the needle, or the tonearm.
This issue is due to the construction of the stylus, which is typically diamond-tipped to create a hard surface that sends sound.
The pressure and weight use specific calculations to ensure the sound transmits correctly. If you change that amount by any additional force, you can add more wear and tear to the product.
When changing the track on a vinyl record, you must take great care to avoid dragging the needle across the record’s surface.
Any impact that involves hopping or dropping it out of a groove can change how the music plays.
How to Change the Track on a Vinyl Record
Have you ever looked at a crosscut section of a tree trunk? You can see rings in the wood that indicate how much growth the tree experienced each year. By counting them, you can tell how old it is.
Although counting rings won’t tell you the age of a record, it can tell you what track to play. If you see six rounds on the surface, you can correlate it to the songs on the label.
Many vinyl records have songs on both sides, so you’ll want to look for Side A and Side B notes. If those aren’t available, look for a Side A notation on the record.
From there, you can count the rings starting at No. 1. That lets you know what song starts on the flip side.
Here are the steps to follow so that you can successfully skip songs on a record when there’s something specific you want to hear.
Step #1: Identify the Start of the Song
When you look at a vinyl record, you’ll see a series of consecutively smaller circles as they get closer to the middle. There is also a thick, darker ring on the outside of these circles.
The thick, dark ring signifies the start of the first track. That’s where the turntable places the tonearm if it has an automatic play function. If it does not, that’s the location to put the stylus to start playing the album.
Most vinyl records have five to seven tracks on each side. You’ll need to find where the song you want to play based on its order.
If you want to play the third song on the album, you will look for two separating gaps after the initial edge to find the starting point.
It isn’t always easy to spot those rings on an older album. You might find it helpful to have a flashlight or a lamp available to see where the song’s start happens.
Once you’ve identified where to start playing the song, you’re ready for the next step.
Step #2: Lift the Tonearm
You’ll need to remove the stylus from the vinyl playing surface while the record spins. If your turntable has a cueing lever, this device must be used whenever you lift or lower the tonearm.
When the record stops spinning while the stylus is still in a groove, it can generate enough heat to damage the vinyl.
Turntables without a cueing arm will need you to lift the tonearm by hand. It helps to rest your pinky or hand on something steady next to the platter. You want a controlled lift to reduce the risk of scratches and damage.
The tonearm is not heavy. You should be able to lift it with a single finger. Once you have it in your possession, be gentle with your grip to prevent causing damage to its hinge.
Step #3: Place the Stylus on Your Track
After the tonearm is successfully lifted, you’re ready to place the stylus at the start of your preferred track. You’ll need to lower it carefully so that it contacts the vinyl at the beginning of the selected song.
It takes a little practice to the specific spot where the song starts. The good news is that it only requires a few tries to get better at this skill.
Once you have everything lined up to your satisfaction, you’re ready to lower the tonearm gently to have the stylus contact the record’s surface. You’ll need to use the cueing lever or a steady hand to complete this step.
After the stylus is on the record in the ring, you’ll hear the song start almost immediately.
You might end up catching the last part of the previous song or be a few seconds into your preferred track at first. That’s okay. It’s better to play it from there than to lift and lower a second time.
You want the fewest number of impacts possible on the vinyl to preserve its integrity.
Can I Repair Scratches to a Vinyl Record?
You can typically skip songs on a record without much difficulty when you do everything right. When something goes wrong, you’ll want a plan to consider.
A stylus dragging itself across a vinyl surface can cause scratches. You can also create nicks and dings by accidentally dropping the tonearm.
If you accidentally scratched one of your records, there isn’t a foolproof way to repair the issue. You can try the following steps to improve the sound or stop skipping issues.
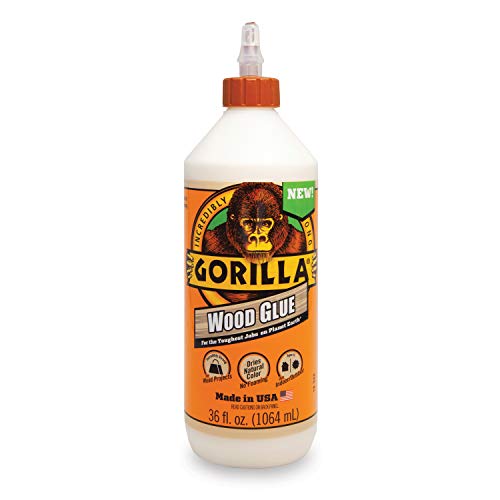
Use Wood Glue to Fix Scratches
If you apply a thin layer of wood glue on a vinyl record, you can increase the rigidity of the channel edges to repair many scratches and remove debris.
Place the tip of the glue at the edge of the inner label. Squeeze the container with light pressure as the record spins, creating lines around the record. Stop once you reach the outer edge.
If you squeeze out too much, you’ll even out the glue amount with the spinning.
Some are concerned about getting glue on their plate or turntable. You can follow the same process on a table by spinning the container around as you lightly squeeze it, but it works better to have the record player spin it for you.
Spread the glue with some cardstock or a piece of cardboard. As the record spins, the glue spreads and covers the grooves as it moves.
Once you have a smooth and even surface, let the wood glue dry for 24 hours. If it feels sticky, let it continue to dry for an hour or two.
Then you’ll peel away the dried wood glue from the outer edge. It doesn’t always lift as a consistent surface, so it might take some time to get it off the record. Once it’s all gone, you can play your favorite songs as tracks as before.
Clean the Dust and Dirt Away
It’s dirt, not scratches, that often prevent a record from playing with the clarity you remember. If you give it a good cleaning, you can often restore its function.
- Place the record on the turntable and turn on the equipment.
- With the record spinning, lightly hold a cleaning brush on the record’s surface to sweep away static buildup and any impurities.
- Continue to hold the brush on the record for up to three spins before angling the brush to remove the debris from the surface.
Clean your brush after each use. Taking this step ensures you’re not spreading debris to other records.
With this method, you won’t be erasing visible scratches, but it will help the stylus pick up the grooves better to avoid skipping different parts of the album.
Some records might require a cleaning solution after the brushing work.
Use a Toothpick to Work on Scratches
If you have scratches that interfere with how the record plays, you can repair them a little with a wooden toothpick.
Apply a little pressure to the vinyl, rubbing the toothpick back and forth on the affected area. This work lifts stubborn debris in the scratch that impacts how the record plays.
You’ll need to be careful with this step because you could make new scratches or cause the existing ones to worsen.
Should You Skip Tracks on a Record Player?
Turntables and records require regular cleaning and maintenance to ensure they work properly. Close the lid over the plate (if one exists), turn the power off, and store each record in an appropriate sleeve when not listening to it. Skipping tracks can increase the need for additional care.
When I need a replacement jacket for my records, I use TunePhonik Replacement Sleeves. Unlike their plastic competitors, you’ll receive an uncoated Kraft brown cover with a spine for extra protection.

- Kraft Finish
- No Center Hole
- 25 Pack
- Made in the USA
There isn’t a center hole with this product, which I’ve found helps prevent accidental scratches.
They stack nicely on shelves, fit inside the original cover, and provide a superior level of protection.
That allows me to pick my favorite songs with confidence because the risks of damage are significantly lower. As long as I place the stylus correctly on the appropriate ring, I know I’ll hear another track I love.