
This might have happened to you before; you’re working on your PC while listening to music, but suddenly there is a clear static sound coming from your speakers.
Immediately you think, let me switch over to my headphones and deal with the speakers later… But then once you’ve switched over, the crackling noise is still there. Why is there a static sound in my headphones and speakers, and more importantly, how can I fix it?
There can be a number of reasons for this happening:
- Poor grounding in your building
- A bad connection
- An internal PC problem (Sound card or motherboard issue)
- Not using high-quality headphones
Like all technical difficulties, once you know the cause, you can fix the issue. Let’s have a look at some causes and solutions in more detail.
Before Wasting Your Time, Test Your Headphones or Speakers
It might be a good idea to run a few tests before wasting your time on making a drastic decision – like sending them to the recycling.
By going through all the smaller / easier to solve possibilities and eliminating them one by one, you move closer to finding the solution, which can actually be quite small and easy to fix.
■ See If the Headphones or Speakers Are the Issue
A very easy way of testing whether your headphones or speakers are faulty is by plugging them into another computer, which you know works properly.
By doing this, you can see if there is still a static sound present. If it’s still there, it clearly tells you your headphones are to blame.
■ Use Better Headphones / Speakers or Have Them Replaced
The quality of your headphones or speakers can make a huge difference in your listening experience. Therefore, if you are experiencing any form of foreign noise (or just downright irritating), it might be time for a trade-in.
Luckily, with a good pair of headphones or a quality set of speakers, you might still have a warranty on them.
We are always looking to save, but investing in a really good, high-quality pair of headphones or speakers can take you a long way.
When you know your headphones are of good quality, you can be sure that you’re taking the right step in avoiding those unwanted static sounds.
Not the Headphones? Let’s Start with These Simple Fixes
OK, so after you have established that your headphones are still working in good order, you have to look for the cause elsewhere.
Doing a few tests can lead to a quick and easy fix. But first, you will have to look at what can possibly be causing your headphones to make this static noise.
■ Check If There Is Any Give in the Port
First things first, you need to check that the headset is well connected. There can be any kind of give in the connection.
A lot of times, there is dust that builds up around the sound card. Check if this is the case so that you can take steps to get rid of it.
Still on the sound card, if your computer uses an integrated sound card, there is a possibility that it can produce the static sound, which will be present when the processor or drive is active.
The natural solution for this is to install a dedicated sound card, but we’ll dive deeper into this subject later.
■ Try Another Connector
You should also try to connect your speakers or your headphones to different ports. If the noise remains, then you can be sure that there is an issue with the speakers or headphones. But if the sound is clear, then it indicates a problem with the port.
It is also a good idea to have a look at the power supply or extension cord. If your extension cord is powering 10 other devices, including your speakers, then (just maybe!) try disconnecting some plugs from the power outlet. This could make a huge difference.
You can also switch to a different headphone jack. Whether you use the front or rear input, switch it up, or if there is only one input on your computer, use the computer’s speaker jack.
■ Use an External Headphone Jack
You can determine if your issue can be isolated to a single jack by simply plugging your headphones into a different jack. If this scratchy static noise has disappeared, then you can be sure that the jack is damaged.
There are many speakers that feature a built-in headphone jack. So, when listening through your speakers, and the sound coming through is clear and static-free, then you should not be experiencing any audio issues when connecting your headphones either.
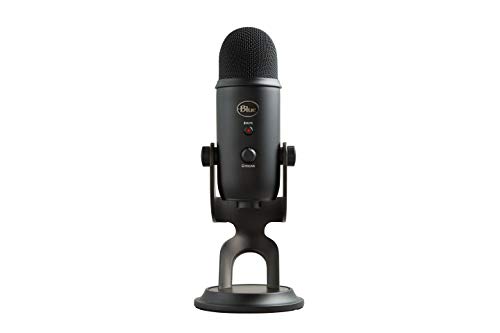
- 3 Condensers
- Patterns: Cardioid/Omni/Figure-8/Stereo
- USB Connectivity
- 20 Hz - 20 kHz
- 120 dB Audio Sensitivity
- Gain Control
- Headphone Output and Volume Control
- Physical Mute Button
- 2-Year Warranty
Try using your external microphone’s headphone jack, for example, the blue yeti microphone, which is equipped with just this.
■ Unplug Your Power Supply from the Laptop
If you’re using a laptop, this should be the first thing that you do. Unplugging the power supply from the laptop has proven to solve the issue for me quite a few times.
When you plug it back in, make sure that the computer is plugged into a grounded outlet.
A grounded outlet has three prolonged terminal plugs, a positive, negative, and a ground terminal (which is the bottom one).
The absence of this ground terminal can be the cause of a ground loop being introduced into the audio system. This can cause humming sound at the frequency of the alternating current.
■ It Could Be an Interference Issue
Have you ever noticed that when you make a call or get a text that your cellphones make this funny static or buzzing noise when you are anywhere near your computer?
Explaining why this is happening can get very technical, but basically, it has to do the combination of your cell phone’s internal antenna picking up the natural electromagnetic atmosphere noise created by electrical processes, and the noise which is present in the receiver’s input.
So, when you are using your device, just avoid getting too close to other electrical devices, as this can cause noise interference.
■ Change of Scenery
It is always a good idea to move your speakers around. By moving it to a different location, you can see if the noise follows. In many cases, it does not because there might have been something near the speakers that caused interference, as discussed above.
You also need to move other devices that have a radio frequency transmitter away from your speakers.
Some speakers and headphones have poorly shielded audio cables. There are many radio frequency devices that can interfere with these cables, which can cause a humming sound.
Some of these devices are: Wi-Fi routers, cell phones, and microwaves.
■ Do Some Cable Management
Messy Cable Syndrome is just something that happens. I don’t even want to look behind my desk – it’s a mess.
Have a look at all the cables connected to your own computer to see if they are organized. If, as it happens, they are not, you need to get them organized asap.
None of the wires connecting your speakers, headphones, or any other peripherals to your computer should come into contact with each other or touch the main power cord.
If your wires are in a bit of a tangled mess, this can be the reason for your audio static or electrical hum. The reason being that wires carry certain types of signals, and these signals can conflict with each other.
Software Issues That Could Cause Static Sound in Headphones and Speakers
Your software has to be kept updated. If you don’t, your static sound could be a result of outdated software or software that needs new settings or some technical adjustments.
Let’s look at some of the software related issues that might be the cause of this disturbance in your audio.
■ Download the Right Audio Drivers
If the sound is coming from your integrated speakers, it could be a good idea to download the audio drivers again. You can easily do this by either going to the manufacturer’s website or by googling it.
If this doesn’t solve the problem, it could be that the drivers aren’t the problem, or that you are using the wrong drivers altogether.
Make sure that you choose the audio driver version that is compatible with your operating system.
If you choose the wrong version, well, it’s just going to be impossible to install. To check your operating system, go to your settings on your computer and just search “operating system”.
■ Make Sure Your Microphone Isn’t Amplifying Your Voice
When your headphones have a mic, that feedback can be amplified into your headphones. This often happens when you have “mic boost” turned on in a mixer.
If you turn it down, it should solve the problem. If that isn’t the problem, try fiddling around with the microphone settings a bit to see if it helps.
You can find these mic settings under Effects > Amplify, and it’s a good idea to boost the effect a bit to see if it makes the static worse (thereby confirming the issue) or reduce the overall volume to get rid of it.
■ Some Programs May Adjust Your Audio Settings by Themselves
I’ve given permission to apps like Skype to change my audio settings (It isn’t a fun experience when you’ve been listening to music, full blast, and when you want to use your headphones again it’s like your eardrums want to pop!).
This can, however, throw some of your other settings out. Just uncheck the option on Skype, and the humming should be gone.
■ Change Your Audio Settings
If you use Windows 10, it’s a good idea to check your audio settings. The playback settings can result in an irritating buzzing sound.
If you’ve done all the checks that it’s definitely not coming from your headphones or speakers, this could well be the culprit.
If you want to check your settings, it’s pretty straight-forward:
Adjust Playback or Speaker Settings
- Go to your speaker settings; it’s in the bottom right corner of your screen in the Taskbar. Right-click on the speaker icon and select Open Sound settings. Open the properties for your connected headphones.
- Under the Levels tab, adjust the Microphone slider to zero.
- After applying the change, go to the Enhancements tab. Here you will be able to check that you have successfully Disabled all sound effects.
Adjust your Recording Settings
- Go to the speaker icon again, and this time choose Recording devices.
- Right click on the Microphone and open Properties.
- Under the Levels tab you should be able to adjust the Microphone Boost slider to zero.
Ok, once you’re done, put on your headphones and try them out. If the problem was here, this should sort it out. If not, we move on to possible hardware issues.
Hardware Issues That Could Interfere with Your Headphones or Loudspeakers
If the software isn’t to blame, we can take a look at some aspects that could play a role in your hardware, causing the buzzing sound.
This isn’t at all uncommon, just think about the terrible sound effect you get when you put two speakers too close to each other.
■ Try Cleaning Your Headphone Jack
Your headphone jack is the connection point, and if that gets dirty, the connection could be disrupted, causing sound, but probably not the kind you were hoping for.
I clean mine ever so often, I mean they go with me everywhere, and yes, they have landed up on my plate after lunch.
The best way to clean them is with a clean tissue and some isopropyl alcohol. You should have a normal computer cleaning kit lying around, and that would be perfect for this.
While alcohol dries quite quickly, you still don’t want to drench your tissue; it should just be enough to visibly clean the surface, getting rid of any grime or dullness.
Make sure that you’re not plugged in a while doing this… there is always the chance of being shocked and your headphones kicking the bucket. This is NOT ADVISED.
▪️ So How to Do This:
- First, you need to unplug your headphones – you need to see the jack to be able to clean it. As an added safety measure, just shut down your computer and disconnect the power cord (I’ve been tempted to just plug my headphones back in immediately).
- Spray some isopropyl alcohol on a tissue or some cotton (I don’t like cotton because it gets stuck everywhere, but if it’s all you’ve got, it’s fine). Make sure it’s not too wet.
- Wipe the jack with the tissue till it’s visibly clean. If you got some dirt in the headphone port, you need to do the same thing but with a cotton swab that you can gently insert and twist around until it’s clean.
- Repeat the process until the tissue or cotton swab comes out clean.
■ Still Not Working? Try a Ferrite Bead
You could be hearing some RF signal that is reaching your ears (not a good idea health-wise either!).
A ferrite bead is an easily attachable device that acts as electromagnetic shielding. You want to snap them on far away from your head, and if you don’t know about the dangers of these signals, I suggest you read my post on it).
Consider Repairing or Replacing Your Computer
If you know that the issue is with the hardware, you could try to get it services professionally, or alternatively, if it’s still under warranty, just get it replaced.
If your warranty has passed, it’s best to just get to the bottom of it yourself. If you have a tower PC that’s giving you issues, the next few tips might be especially helpful.
■ Try Fixing Your Headphone Jack’s Connection
If your headphone jack connection is broken, you can try fixing it. This is a bit of a specialized mission – I’d definitely suggest sending it in for repairs first, but if all else fails, I guess you can give it a shot.
I have a friend who’s a computer technician (it’s great to have friends in high places), and he showed me once how to do this – I’ll walk you through the steps.
You’re going to need a hot soldering iron; you can plug one in so long to heat up. After that, we basically just shut down the computer and removed all the cables.
Next, remove the side panel casing and try to locate the headphone input. It helps if a buddy shines a light from the other side onto the headphone jack port – some light always filters through.
Once you’ve located it (and this can get tricky because in some models it’s behind the hard drive), make sure you have some space to work.
Now comes the tricky part – you need to solder the tip of the headphone input jack until a small bead forms, this will ensure that the connection is good.
Also, there are two connection points, so repeat the process on the other one too and make sure you don’t solder them together.
That should fix any issues and give you that perfect, clear sound. All in a day’s work, really.

■ Upgrade Your Sound Card
An outdated or faulty on-board sound card can lead to fuzzy sound. It is time for an upgrade my friend. You’re going to solve your buzzing issue and have some seriously great sound quality.
To actually install the new sound card isn’t all that difficult, as I recently found out. I wasn’t quite happy with my on-board sound and decided to get the ASUS Essence STX II – I like a sound card that’s going to give me great sound no matter how I use it.
To install was pretty simple, especially if your computer has PCI Express slots. You need to figure this out before you decide on a sound card, because cards are made specifically for the different slots.
Next, just shut everything down, safety first. Plug out the cables and any other connected devices and open ‘em up.
As an added precaution, I like to just touch some metal object before I work on an open PC, I’ve been shocked before – not fun. The metal grounds you, and any discharge will head that way.
If you already have a sound card, and it’s broken, you can just remove that. Some electronics can be recycled, so definitely do that if you can in your area. I have an entire article on recycling your electronics, if you’re interested.
To remove the card, you’ll have to unplug the connection cord; it’s pretty easy, just give it a wiggle, note where you let it hang while you get the new sound card ready, you’ll have to plug it in again.
Remove your new sound card and connect it, you can then slide it into the slot. Give it a nice final push, just to make sure it’s secure. You’re all done! Just close up the case, get everything plugged in and switch your PC on.
You will then need to install the drivers, etc. but once that’s done, you’ve got some sweet sound, and you didn’t have to send your PC away to get it done.
How to Get Rid of Static Sound in Headphones When Using a Smartphone
If you’re only getting that static sound when using your headphones with your smartphone, there are a few things you need to check.
First of all, make sure the static sound is coming from your headphones only, just plug them out and listen to the audio through your phone’s speakers.
If it continues, and you’re on a call, it could be a network-related issue. It could also be the specific audio file that you’re listening to, try skipping to the next one to see if that helps.
However, if it continues for a few days or it’s only coming from your headphones, there might be other issues.
At this point, it’s always a good idea to just do the old trusted reboot. Shutting down your phone is like the number one thing you should always do to try and fix something. Trust me – it works.
BUT, if it doesn’t, it could be a hardware issue. Not great, but not impossible to fix. You could send your phone in for servicing.
If you don’t think the issue is with your phone, perhaps the issue only happens when you use your headphones, then just check the general condition of your headphone cord and jack.
If everything looks good, it could be the jack connection to your phone that’s at fault, plug your headphones into another device to see if that solves the problem.
If the audio jack is the issue, this isn’t as easy to fix as it is in a computer, you’ll probably have to send it in for repairs, and if your headphones are visibly worn, they might need servicing too.
Hopefully, I’ve been able to help you solve the mystery and fix your audio problem! If not, post your issue and details in the comments, and I’ll try to help. Two minds are better than one!