If you don’t seal a speaker box correctly, your audio system cannot accurately reproduce the low frequencies.
The container’s air serves as an insulator, just as it does for double-pane windows and any other application.
Trapped air also works like a shock absorber, which lets the speaker move with more control and less interference.
When you don’t have those insulative qualities, you’ll never get the full effect of what your speakers can achieve.
That’s why knowing how to seal a speaker box is a critical part of your installation experience.
Best Tips for Sealing a Speaker Box
The best way to seal a speaker box is to use organic materials (wood) with silicone or epoxy. Each measurement must be precise to keep your cuts to a minimum. If any air gaps form after you’ve finished the construction, seal them with caulk.
Everyone has an opinion about how, when, and why you should seal a speaker box.
Although there isn’t one correct way to complete this job, you can find plenty of incorrect advice lingering online.
Some people prefer to use resins. A few like to use wood glue. There’s even the occasional DIY guide that incorporates expanding foam!
What you must remember is that you cannot use old materials to create a new speaker box.
You need fresh lumber from your local store or mill to make an appropriate container.
Before you start on this project, it might help find a template that you can cut along.
It also helps to take the speaker’s measurements to design a cabinet that fits your overall needs.
How to Create a Sealed Speaker Box
You’ll need to gather some materials to complete a speaker box. It usually works best to use 1/2-inch plywood, although MDF or particleboard can serve in a pinch.
The adhesive you prefer should be in your shopping cart.
It also helps to have clamps that hold the box in place once you’ve cut and glued it.
The final product may need 24-72 hours to dry, which means you don’t want to be standing there the entire time!
Once you have the materials, you’re ready to start the building process.
1. Measure the Dimensions of Your Speaker Box.
Your speaker should fit comfortably inside of the box.
The primary sound point will come through the wood, which means you’ll need to know the circumference to cut for it. The rest of the electronics will fit contained within the unit.
You want the box to fit like a cabinet for your speaker. That means it should fit snuggly without much wiggle room.
It’s okay to have some air on the sides since you want the insulative qualities it provides.
Please remember to measure twice and cut once. If you get it wrong with a short cut, you’ll be buying more lumber!
2. Create the Smoothest Cuts Possible.
If you’re reading this guide, you probably don’t do woodworking as a hobby.
Most audiophiles and speaker enthusiasts rely on their intuition and a basic understanding of saws, measuring tapes, and glue to finish this work.
A smooth cut eliminates the jagged edges that cause air to leak out from the box. You can avoid this issue by using a straight, consistent cut.

If you don’t have a table saw, use two sawhorses and a circular model to create the long lines you need for the box.
It helps to trim outside of the lines because you can sand the surface down to get a perfect fit.
Once you have the pieces cut, use a drill bit to create pilot holes in your box. They should go to each corner so that you can build strong joints.
Don’t rely on the screws to penetrate into the wood to create the joint you need. Without a pilot hole, you risk cracking through the panel’s sides and starting over.
Once you have the pilot holes in place, you can attach the walls to your box with a cordless drill. It is often helpful to have another pair of hands for this step to ensure you get an even finish.
3. Select the Sealant You Prefer.
Once you have the box pieces cut, it is time to glue them together. That means you need to make a decision about the sealant to use for your container.
Although silicone is the most common choice for this project, that decision usually reflects the fact it is readily available at home.
Each adhesive product has some specific pros and cons to consider. Here is a look at what to expect with the best choices you can purchase today.
| Advantages to Consider | Disadvantages to Manage | |
| PVA GLUE: | – It dries hard, bonding well to most lumber products. – You can find it in exterior or interior grades. – Some types are waterproof. | – It requires brace edging to create a strong hold for a speaker box. – You must use a paintbrush to apply it to all services. |
| POLYURETHANE GLUE: | – It fills the gaps that sometimes form when building a speaker box. – If the glue comes out of the joint, the wood still accepts stain. – It reduces pockets where air could escape. | – It requires fresh lumber to create a strong finish. – If it doesn’t cure correctly, the vibrations from the speaker can cause it to disintegrate. |
| EPOXY RESIN: | – Provides extra strength for tough joints. – It gives you a hard finish within five minutes for most products. – You can use it on a variety of materials. | – It can take up to three days to fully cure, even when using a quick-dry product. – Using too much of it can soften natural components. |
| PVA GAP SEALANT: | – It provides you with a strong adhesive that holds the box together well. | – The product shrinks when it dries, which can pull apart your box. |
| SILICONE SEALANT: | – This product bonds well to most surfaces. – It seals the internal seams to prevent air from escaping. | – Normal silicone releases an acidic byproduct that can ruin your speakers. – You must work in a ventilated environment to have a successful experience. – The finished product cannot be machined, and it won’t accept paint or some finishes. |
| HOT MELT GLUE: | – It is the most affordable product you can use as a speaker box adhesive. – Using it adds extra strength to your internal ports, edges, and seams. – You can use the product to attach cloth to your frames. | – It doesn’t have enough strength to work by itself unless you’re working with a small speaker. – If the product cools prematurely, you’re left with sticky strings that go everywhere. |
| POLYURETHANE CONSTRUCTION ADHESIVE: | – Creates the strongest bond you can have with an over-the-counter product. – Seals your speaker box in a single step. | – You need to clean up the seams by using a router or a grinder. – It isn’t the cheapest product to use for your box. |
4. Put Together the Box to Seal It.
Once you’ve reached this step, it is time to construct your box. You’ll need to seal the inside of the container first because wood is porous.
Unless you fill those gaps, the air will escape through the walls with the speaker’s movement.
The best product for sealing the inside of your container is a waterproofing product.
Although some builders recommend using adhesive caulk, a water-based deck sealant does an excellent job.
You can also use a silicate paste or fiberglass resin to complete this step.

If you use the latter option, it is essential to wear gloves throughout the entire treatment process to prevent splinters and injury.
5. Seal All of the Extra Holes in Your Cabinet.
Your speaker needs one primary hole to push the sound out when engaging your audio system. It also requires a place for the terminals and power to reach the unit.
If you forget to seal these areas, air can still escape.
The best way to finish this step is to use a gasket, plastic ring, or a rubber seal that fits around the components that come into the box.
Once you have the item placed where it needs to be, you can put adhesive around the edge to prevent it from becoming dislodged.
6. Use Epoxy Putty to Fill in Any Remaining Gaps.
Depending on the adhesive you selected in Step #3, you might have some remaining gaps to fill when you reach this stage of the project.
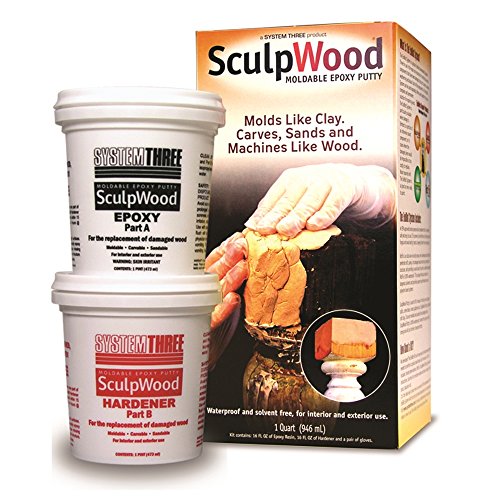
Your best option is to use a spreadable epoxy putty.
If you see any gaps after taking this step, you’ll need to redrill your sides for the screws that keep your joints tight. That’s the only way to get a better seal.
Reach in to cover all of your internal seams one more time with a sealant.
This extra layer might not seem necessary, but it will prevent any lingering gaps from having an adverse effect on your sound system.
7. Clamp It Down.
Once you’ve reached this step, your box is ready to hold its shape. You’ll need to clamp it down for the longest time recommended by the products you used.
If a product says that it dries in 24 hours and takes 72 hours to cure, you’ll need to wait three days before slipping your speaker into place.
Please don’t rush through this process! Some fumes from sealants and epoxies can damage your speaker drivers.
You’ll need them to clear out of the box before trying to finish the fit.
Once you’ve gone through the longest curing time, you can sand away any excess sealant.
Some people like to add an aesthetic finish at this stage, which might be paint, stain, or felt.
At this point, you’re ready to try out the new speaker box!
Do I Need to Use a Speaker Box?
The primary reason why you’d use a speaker box is to support your subwoofer.
The added air and enclosed cabinet provide extra vibration that enhances the listening experience.
You’ll hear and feel the lower frequencies in your favorite songs by taking this step.
If you have an exposed speaker, placing it in a cabinet or box can provide a similar result.
Car speakers often need this installation because they don’t come with any other supports.
When you buy a bookcase speaker, something for your home theater system, or a similar product, the cones and drivers are already contained in the box.
If you place it in another one, you might reduce the effectiveness of your installation.
Can I Purchase a Speaker Box Online?
If you don’t want to create a speaker box from scratch, you’ll find that a few options are available online.
The problem with this technique is that most items are automobile-specific.
That means you must find a specific box that works with your make and model of car.
That isn’t always possible.

If you find one that works, such as the Bbox A152 sealed subwoofer enclosure, you’ll need to verify that it is airtight.
That means the sealing work still happens.
You’re only shortcutting the first two steps and potentially paying more to do it.
If you already have a speaker box, this guide can help you find the right sealing process to improve your unit’s performance.
You’ll see bass improvements, better low-frequency reproduction, and a throatier sound for any music genre.